Snowmobiling Near Vail

Vail Snowmobiling: Where to ride

Vail, Colorado is known for world class skiing, but no winter vacation to Eagle County is complete without experiencing the phenomenal snowmobiling that can be had in the Vail Valley of Colorado.

Can You Snowmobile Near Vail Mountain Resort?

The short answer is no, you cannot. There is no snowmobiling allowed near the resort. There are however a few riding areas within 20 to 40 minutes depending on road conditions. The most popular spot is known as Vail Pass which offers close to 60,000 acres of pristine forest and tree line terrain in the Vail Pass Recreation Area. Other spots near Vail include the Piney Lake Region (a little more difficult to access than Vail Pass) as well as riding in the region known as Sylvan lakes which is a solid 40 minutes outside of Vail. Sylvan Lakes is a very remote region and should really only be ridden with a local who has backcountry expertise.

How Do You Access Vail Pass Snowmobiling?

There are three access points to Vail Pass. If you have your own machines, the Vail Pass summit along I-70 offers parking with spots for trailers for $10/day. There is also limited free parking along Highway 24 known as Tennessee Pass near Camp Hale. Download our Vail Pass Skiing Map here which indicates the parking locations. The third and BEST option is to rent snowmobiles from RMAR from our Red Cliff location or park with your own machines and trailer on the Red Cliff side of Shrine Road which provides direct access to Vail Pass. Lunch or dinner at Mango’s Mountain Grill will be one of the highlights of your snowmobiling day on Vail Pass.

Where is the Best Place to Stay When Snowmobiling Near Vail?

There are multiple hotels and vacation rentals in and near Vail that can serve as your base camp. Sonnenalp Vail and Lodge at Vail are just a few of our favorites. Rocky Mountain Adventure rentals offers pick up and drop off services to and from lodging or can refer you to a transportation company. For those of you who are looking to do more snowmobiling than skiing, your best lodging option is the Green Bridge Inn located in Red Cliff. The Green Bridge Inn is directly across the street from our RMAR Red Cliff location and the famous Mango’s Mountain Grill. 

Rocky Mountain Adventure Rentals offers snowmobiles for all levels of riders and we pride ourselves on the high quality of our sleds. Our Timbersled Snow Bike rentals are ideal for intermediate/advanced riders of dirt bikes and can handle any terrain and any condition. Our Timbersled Snow Bikes are built using a KTM 450 SXF Body.  Learn more about Timbersled Snow Bike Rentals

[/vc_column_inner]

Snowmobile Rentals

We offer a variety of Trail Sleds for backcountry touring and High-performance Powder Sleds for big mountain riding from Polaris Industries including the Polaris Pro RMK850 Patriot. Each machine is professionally maintained by our Polaris certified mechanics. Learn more about Snowmobile Rentals

See All Places to Ride Snowmobiles

[/vc_row_inner]

Snowmobiling Near Colorado Springs

Colorado Springs Snowmobiling: Where to ride

Those living in Colorado Springs have easy access to Buena Vista. In Buena Vista, you will experience some of the best snowmobiling in the state. Legendary pro snowmobile rider Chris Burandt even calls Buena Vista home due to its world-class terrain.

snowmobiling colorado springs

Where should I ride if I’m a beginner or intermediate snowmobiler?

Cottonwood Pass just outside of Buena Vista offers terrain that is great to learn on and fun for those who just like to speed through open powder fields. Cottonwood Pass offers both packed and unpacked trails for Powder riding and trail sled riding. For those who are new to the sport, we offer half-day guided tours that include instructional riding lessons.

Where should I ride if I’m an advanced snowmobiler?

St. Elmo just South of Buena Vista is known for its challenging terrain and deep snow. Located near Mt. Antero and in the shadows of Mt. Princeton, the riding in St. Elmo is for those who want to experience deep backcountry routes. We offer full-day timbersled rentals and performance snowmobile rentals to explore the area with.

Where is the best place for lodging if I want to ride two or more days?

Buena Vista offers plenty of lodging options from AirBnB’s to Bed and Breakfast to Hotels and Resorts. We are big fans of the Surf Hotel located in the new downtown area of Buena Vista along with the Mount Princeton Hot Springs Resort and Lodge.

Map of Buena Vista

90 Minutes from Colorado Springs

2 Snowmobile Riding Areas: Cottonwood Pass & St. Elmo

For Reservations, Give us a call at: 719-966-5233 or Book Online

Buena Vista Guided and Unguided Snowmobile and Timbersled Rentals from RMAR

Timbersled Snow Bike Rentals

Our Timbersled Snow Bike rentals are ideal for intermediate riders of dirt bikes and can handle any terrain and any condition. Our adult Timbersled Snow Bikes are built using a KTM 450 SXF Body and we also offer the Timbersled ST Ripper for kids who want to ride. Learn more about Timbersled Snow Bike Rentals

Snowmobile Rentals

We offer a variety of Trail Sleds for backcountry touring and High-performance Powder Sleds for big mountain riding from Polaris Industries including the Polaris Pro RMK850 Patriot. Each machine is professionally maintained by our Polaris certified mechanics. Learn more about Snowmobile Rentals

Guided Snowmobile Tours

Guided Tours are perfect for those looking to learn how to snowmobile or would prefer a family adventure with someone who truly knows the area. When it comes to local history, riding locations and skills, RMAR guides are some of the most knowledgeable in the state.  Learn more about Guided Snowmobile and Timbersled tours

For Reservations, Give us a call at: 719-966-5233 or Book Online

Pampered and Powder

Sena N.

Snowmobile + Hot Springs Weekend

March 2019

Thank you RMAR for organizing our girls only “Pampered and Powder” weekend in Colorado. 

We easily coordinated our flights from 3 different US cities into Denver International Airport then drove to Mt Princeton Hot Springs & Resort. It was an easy, beautiful 2.5 hour drive into the Rocky Mountains. 

Our cliffside, 2 story log cabin was cozy, comfortably accommodated all of us, and offered easy access to the resort’s restaurants, spa & natural hot springs. We ate breakfasts & dinners at the resort’s Princeton Club. The views in the dining room are breathtaking, and the wine selection & cocktails are delicious.

Red Cliff

The resort is a 20 minute scenic drive to RMAR’s trailhead. Clay provided us directions in advance, and he and Stan met us with the new Polaris snowmobiles. They even fitted us with warm winter gear for the ride: snow pants, gloves, boots, and helmets. We didn’t have to buy or pack any of this bulky clothing! After a brief but thorough instructional lesson, we sped down the groomed trail after our guide, Clay. He periodically stopped to check on us and to take pictures. We suggested adding a hot cocoa break at the top of the mountain next time. When we returned to the trail head, we left our sleds and gear with Stan. It was so easy!

After snowmobiling all morning, we drove into Buena Vista and had lunch at River Rock Kitchen. Highlights in Buena Vista included a walk along the Arkansas River, shopping locally produced items in a few gift shops, and enjoying a cup of cappuccino at The Roastery. 

Mt Princeton’s Spa & man-made mineral hot springs are the rewards for a full day of mountain sports & activities. We met guests from across the globe as we soaked in one of the many hot pools. We intentionally tried different spa treatments and agreed each was excellent.

RMAR, this kind of weekend was a first for me, but it was a hit! I can’t wait to come back in the summer to try your Razors, Slingshots, and another good soak in the hot springs!

Onewheel: How To Ride

Onewheels for beginners

How to start, How to turn, How to Stop

First Step: Get to know the Onewheel App

Onewheel has an app and it’s quite slick. It allows the user to put the board into different modes for different speeds and terrain. We recommend starting in the beginner (Sequoia) mode.

How fast can Onewheels go in each mode?

[12 MPH] Mode: Sequoia

Where beginners should start. Very playful and more town oriented. 

[15 MPH] Mode: Cruz

In the exact middle of playful vs aggressive and town vs trail. 

[19 MPH] Mode: Mission 

Leaning towards playful more than aggressive and more suited to the town vs the trail but still very ready to be a bit more aggressive and on trail if need be.

[19 MPH] Mode: Elevated

Recommended for hill climbing and park riding. A good mix of playful vs aggressive and town vs trail. 

[20 MPH] Mode: Delirium

This is your aggressive trail riding mode. Very responsive and “eats singletrack for breakfast”. 

[20 MPH] Mode: Custom

Feel free to customize your own setting. 

Onewheel: How to get started

Much like a skateboard, to get started on a Onewheel, you position one end of the board angled down towards the ground with the other end of the board up in the air. Depending on whether or not you naturally ride regular footed (left foot in front) or goofy footed (right foot in front) will determine which foot you start with. For sake of discussion, lets assume you are riding regular foot (left foot forward). Step on the back of the board with your right foot and then step on the front with your left foot.

Get Balanced

To start off, the end of the board that is in the air has a line separating where the users front foot toes will be and where the heel of your shoe will be putting pressure on the board. The motor in the board will not activate unless there is pressure in the toe and heel area. The Onewheel allows its rider to get balanced first before activating the motor inside. Once the board is level and stable, you will be able to lean forward or backward to tell the board in which direction you want it to accelerate.

Get ready to have some wobbly legs!

If your legs are not used to the sensation of balancing on a single focal point, the stabilization muscles in your legs are going to be working very hard to keep your weight balanced over this single point. An athletic stance helps with the balancing aspect of learning.

Build Momentum

Once you get a little momentum, you’ll notice that there seems to be a perfect angle that allows the board to accelerate. We found the board to be very responsive when we leaned in the opposite direction of our momentum with intentions of slowing down or eventually rolling in the opposite direction. We were also very impressed with Onewheel’s ability to accelerate uphill and over inclined terrain.

Beware of Pushback

The Onewheel responds right away and slows you down at a reasonable rate. However, if you are not ready for this slow down, we can see how a user may remain at a faster speed while the board remains at a slower speed resulting in the user flying forward. The Onewheel website calls this “pushback”.

The all important dismount

Once a Onewheel’s rider has had enough fun, it is time to dismount safely. A novice or beginner dismount is coming to a stop and jumping off the board with both feet at the same time. A pro dismount and the main way Onewheel likes to be dismounted is coming to a stop, lifting your left heel for regular riders and right heel for goofy riders off the board. The riders toes will still be on the board. Then, tilt the board back on the same side that was previously on the ground when mounting. Make sure to remember which foot has the sensor underneath it!

Onewheel Rentals

Full Day: $75

Half Day: $50

Season: May - October

Rental Locations:

Vail, Colorado

970-471-8491

Buena Vista, Colorado

719-966-5233

Helmets and safety pads are provided with each Onewheel rental.

Timbersledding for Women

Women & Timbersledding: Interview with Sasha Eagen

As a relatively new sport, Timbersledding—sometimes called snow biking—is seeing rapidly growing interest from men and women, alike. In Colorado, the first known cross-country snow biking races were held in the winter of 2017, and Rocky Mountain Adventure Rentals (RMAR) rider Sasha Eagen topped the women’s field in the Sledstock 2017 at Rabbit Ears Pass event. We recently caught up with Sasha to get her insight into the sport and to hear her tips and advice for other women who would like to give this exciting winter sport a try.

But first of all, what is a Timbersled?

Timbersled is the brand name for a snow bike conversion system that allows dirt bikes to be converted into snow bikes for winter riding on snow-covered terrain. The Timbersled system essentially results in a snow bike that has the terrain capabilities of a snowmobile but with the agility of a dirt bike. The machines are sometimes called snow motorcycles, snowtercycles, or snow dirt bikes.

Timbersledding in Colorado is gaining popularity, and as Sasha Eagen demonstrates, women have no reason to shy away from getting in on the action. An adventurous spirit and a willingness to try something new are all that’s really required for someone who wants to try out Timbersledding, but as with any other sport, strength and skill are important for progression in the sport.

Sport Background and Timbersledding:

How did you get into Timbersledding? What is your sport background?

Sasha E: I raced moto in my 20s, and I learned a ton about throttle control and how to throw the bike around underneath me. Going fast on two wheels is one of my favorite things to do. So one snowy morning, I received a phone call from my older brother, who requested I “come out and check out these sick Timbersleds.” So I did, and it was the best day in the backcountry I have had to date!

What it has been like to pioneer Timbersled racing in Colorado? What’s exciting? What gets you scared?

SE: I don’t think of myself as pioneering Timbersleds—I think of it as going out to play with my friends on machines, and finally someone made a toy that is fun for me to keep up with the boys. I was super excited to start racing again because I see Timbersledding as a blend of snow and power, which is the recipe for a perfect riding machine for me. I was super nervous, too! When racing, I wanted to finish and not be last, but when I got in the gate, my moto-racing skills kicked in, and my body took over. It was epic. When the gate dropped, so did my throttle, and it was just another day of riding. I was trying to keep up with the pack, and I did. The part I was worried about was making tight turns and not falling over. I totally fell and spent the rest of the race trying to gain that fall over on the clock.

I am super stoked to see what this winter holds for snow bike racing in Colorado, and I’d like to see if we could get more women out riding the Timbersleds. Nothing stokes me out more than seeing more women get into this sport. In turn, I hope this would lead to more women racing Timbersleds.

Timbersledding: Tips and Advice

How do you train for Timbersled racing? What skills help you out the most?

Cross-training for sports has been something I love to do. As an athletic trainer, I find that a regular workout routine helps keep me fit for any sport. And Timbersled training is no different. I focus on balance, core strength, and cardio six days a week. Also having a regular yoga practice helps me focus on my breathing work because sometimes breathing is what it takes to make the ride more enjoyable.

What are some of your favorite things about Timbersledding that are different from either snowmobiling or dirt biking?

Sasha E: Going fast and jumping the Timbersled is my favorite. Timbersleds are also really FUN to ride. I literally can point to a place I’d like to go, and I grip the throttle and rip it open. A Timbersled is easier for me to move around and turn, whereas a snowmobile takes all my weight to turn, and even then I sometimes won’t get the desired turn I want on a snowmobile. Timbersledding is similar to a dirt bike, but you can’t put your feet down on a Timbersled when you want to stop, which takes some getting used to.

What advice do you have for women getting into the sport?

SE: Just try it. Do it…life is a journey, and Timbersledding is something EVERYONE should try.

What are some things you wished people had told you or taught you about Timbersledding before you first tried it?

SE: I went out with an open mind and the idea that I would have fun. Rocky Mountain Adventure Rentals gave me a good idea about what to expect, and those were great building blocks.

My biggest pointer is to make sure your elbows are out and that your head is up. A Timbersled handles similar to a dirt bike, so trust that your machine will do its job, and you can do yours. Speed will help you get where you want to go, but take it slow in the morning to warm up and get to know your machine.

What’s your strategy for getting back up when you fall over in the backcountry with a Timbersled?

SE: Anything! I try to get my hip under the bike to help with leverage. Sometimes just having a friend help you get it back up is great. I use all my power to get back up. Getting all my weight under the machine as quick as possible helps me use less energy, but I try not to fall over so that I don’t have to worry about picking it back up. That is my best strategy.

Anything else you want to add about gear, clothing, training, racing, or riding Timbersleds?

SE: Go try it. Timbersledding is the most fun thing to do in the backcountry. I personally wear protective gear like knee braces, a neck collar, and obviously a helmet. I just try to set myself up for a great day, and that starts with dry clothes, warm boots, and a full tank of gas! And maybe take a little water and a snack in case you find yourself bonking while riding.

RMAR is the leader in Colorado’s growing Timbersled rental market, and we’re also pioneering Timbersled Snow Bike riding and racing in Colorado. Timbersled rentals and tours are available at our Vail, Red Cliff, and Buena Vista locations. Call to reserve: (970) 471-8491.

Guided Timbersled Tours: Cottonwood Pass

Experience Cottonwood Pass near Buena Vista on a Guided Timbersled Tour. Learn more about Timbersledding Cottonwood Pass

[lightframe shortname=”rmar1″ fallback=”simple” full_items=”yes” flow=”no” view_item=”202837″ class=”fh-button-flat-orange fh-shape–square fh-icon–cal”]Book Now: Cottonwood Pass[/lightframe]

Guided Timbersled Tours: St. Elmo

Explore the advanced terrain of St. Elmo near Buena Vista on a Guided Timbersled Tour. Learn more about Timbersledding St. Elmo

[lightframe shortname=”rmar1″ fallback=”simple” full_items=”yes” flow=”no” view_item=”202843″ class=”fh-button-flat-orange fh-shape–square fh-icon–cal”]Book Now: St. Elmo[/lightframe]

Timbersled Snow Bike Rentals

Our Timbersled Snow Bike rentals are ideal for intermediate riders of dirt bikes and can handle any terrain and any condition. Our adult Timbersled Snow Bikes are built using a KTM 450 SXF Body and we also offer the Timbersled ST Ripper for kids who want to ride. Learn more about Timbersled Snow Bike Rentals

[lightframe shortname=”rmar1″ fallback=”simple” full_items=”yes” flow=”no” view_item=”202515″ class=”fh-button-flat-orange fh-shape–square fh-icon–cal”]Book Now.[/lightframe]

Backcountry Gear Checklist

Backcountry Gear: Don’t wipe with that

tips and tools for a safe backcountry experience.

It’s a beautiful day and you decide to head out to experience the great outdoors. Knowing that the weather can change at any moment, you begin to ask the question “How do I pack for the outdoors?” or “What should I bring with me?”. Having a backcountry gear checklist is essential when it comes to planning your next outdoor adventure.

To begin, start by choosing the right pack.

Before you can even begin to think about what goes into your pack, you first need to determine which pack to bring. Your pack should be durable, preferably made with waterproof or water resistant material. It should also be comfortable for you, even if you are heading out in a vehicle, you never know when you may need to walk. A 30-40 liter pack is a great size for a single day expedition.

Backcountry Gear Checklist:

There are hundreds of outdoor brands out there and even more gadgets. To help simplify the options, Let’s break down backcountry gear into 5 groups:

1. water/food storage
2. outer-wear
3. shelter
4. communication
5. first aid.

Water and food:

Being able to purify or filter water when exploring is the only way to ensure that you will have enough to stay hydrated. Make sure you practice with the pumps and filters. If you decide to use chemicals to purify water, make sure that you fully understand the correct ratios to safely use them. Many chemicals will leave an aftertaste in the water that most people find unpleasant, but they are very reliable and will not break like a mechanical filter. A water bottle that can also be used to boil water is a good way to purify water, but requires you to carry a stove or start a fire.

For day hikes, some lightweight snacks like granola bars, trail mix, chocolate and other high calorie foods are preferred. Keep in mind that animals love gray jays and marmots and squirrels are very good at finding your snacks. Don’t leave your food or pack unattended; it’s no fun to find a big hole or a chewed strap in your pack.

1. Water Filter or Filter Tablets (Chemical Tablets)
2. Water Bottle
3. Trail Snacks

Outerwear:

This is the most complicated part of trip planning and you should take the time to test out and get comfortable with this gear. Depending on the environment or time of year, you may need more or less, but a poncho or light rain gear is always recommended. gloves, a hat and sturdy hiking shoes are also recommended. For waste management, a small shovel, wet wipes and wag bags will keep you clean and happy.

1. Rain Gear
2. Gloves
3. Hats (knitted for warmth, baseball cap for sun)
4. Hiking Shoes or Boots

Shelter:

A poncho or tarp can double as a small shelter and there are many ultra light tents out there. Some bungees or 550 cord, and a sturdy knife will make creating these shelters much easier as well. Shelter also includes fire making supplies.  Flint and steel, matches, and stoves are very handy but require skill and practice to use safely. Please ensure that fires and stoves are permitted in the area you are exploring and practice the Leave No Trace principles. Patches, duct tape and a sewing kit are also great items to pack for the wear and tear that your gear will experience.

1. Tarp or Light Tent
2. Bungees or 550 cord*
3. Dependable Knife
4. Patches
5. Duct Tape
6. Sewing Kit

7. Flint and Steel
8. Matches
9. Stove


What is 550 cord?

The cord originally used on the Soldiers’ parachutes in WWII was known as “paracord”. 550 cord is simply paracord with a minimum breaking strength of 550 pounds.

Communication:

Handheld GPS, phones, InReach and other devices are great but are mechanical and can fail.  Do not rely solely on mechanical devices. Always let someone know your trip plans including the routes being used, activities you will be doing, and when you will be back. If you are using maps, ensure that everyone in you group knows where they are and that they understand how to use them. A notepad and pencil can be very helpful in emergencies as well.

1. Handheld GPS
2. Topo Maps
3. Compass
4. Notepad and Pencil

First aid: Get trained!

Basic first aid and CPR is highly recommended for anyone in the backcountry, but Wilderness First Responder classes and EMT training are even better. Check that the others in your group also have this training and have any medications they are prescribed. After you have the training, you will understand how to assemble a first aid kit and what tools you need in the specific area(s) you are vsiting. Splints, wound/bleeding management and breathing barriers are the basics but be sure to find a kit that suits your activity.

1. Splints
2. Bandaids
3. Surgical Tape
4. Surgical Glue
5. Elastic Bandages

Having a well stocked pack is essential. In time, you will find which backcountry gear works best for you. Outdoor enthusiasts love talking about gear, so don’t hesitate to ask! The more time you spend in the outdoors, the more capable you will become and you never know when a situation might arise that you will be glad you have these tools.


Colorado Trail Etiquette: ATV, UTV, RZR Side-by-Side

ATV / RZR Side by Side Trails, OHV Trails, and Dirt Bike Trails

Be courteous to all non-motorized trail users. Respect the wildlife, livestock, and all who use the trail.

All OHV and ATV trails are in danger of being closed due to the irresponsible acts of a few. As an avid user, you can help protect our available trails for motorized use by setting a good example for all and using proper Colorado Trail Etiquette while out in the backcountry. Your behavior becomes associated with all trail riders including dirt bikers, atv riders, 4×4’s, and all other forms of motorized travel. Please do not act in such a way that will leave a black eye on the sport. A little common sense and common courtesy will go a long way in helping to protect our available lands for future motorized recreation.


COLORADO TRAIL ETIQUETTE FOR MOTORIZED VEHICLES

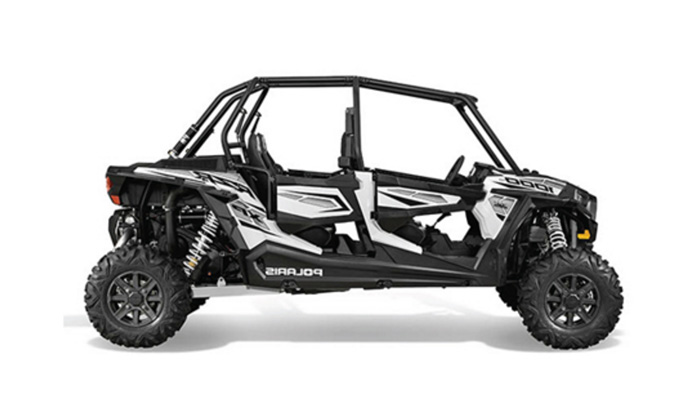
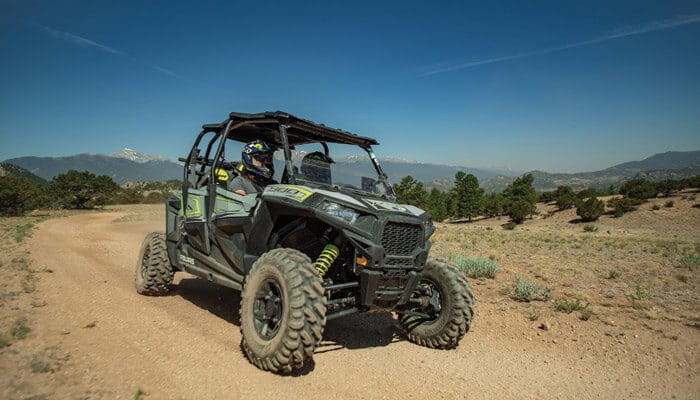
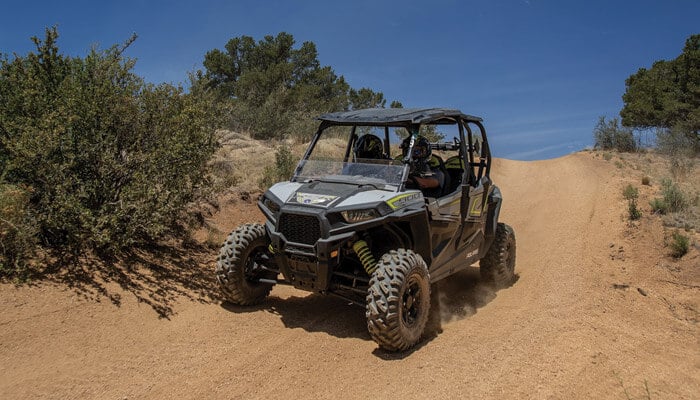
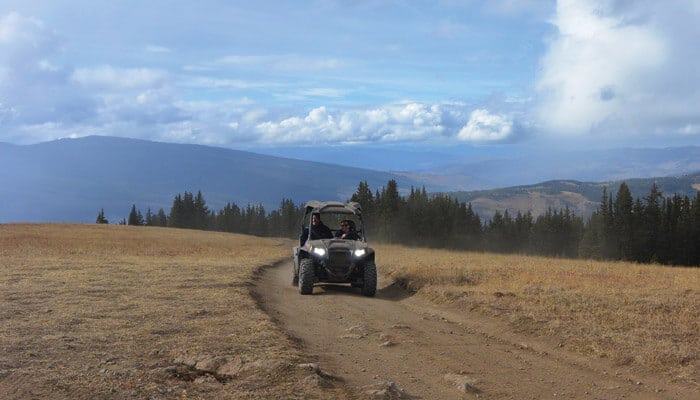
Colorado trails for side-by-side’s, UTVs, and ATV’s

Most side-by-side’s (RZR’s) are wider than the 50″ width allowed for standard ATV Trails in Colorado. Due to the added width, all RZR’s must remain on trails that are designated for full-size 4WD vehicles. All rules and regulations are based on the actual width of your vehicle. Just because your manual suggest that your ATV is under 50″ your aftermarket wheels and tires could place the vehicle over the 50″ threshold at which point you can no longer legally use the ATV on ATV designated trails in Colorado.

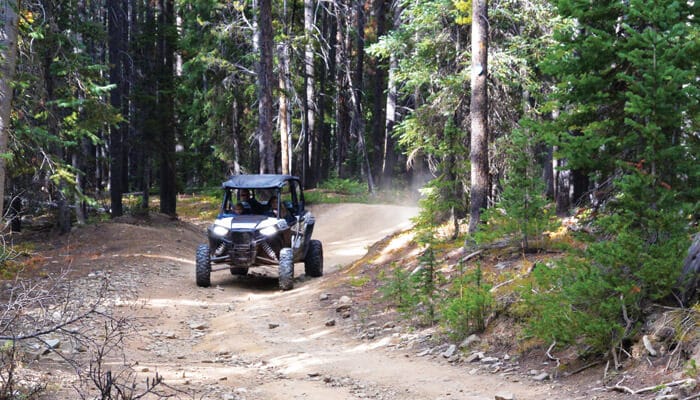
Only ride on trails that are wider than your vehicle:

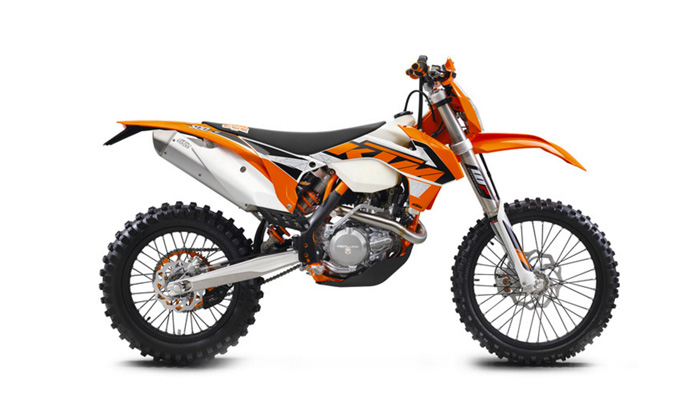
A general rule to keep in mind is that if your vehicle is wider than the trail, don’t proceed forward. Only dirt bikes should be on single track trails. Trail width is often associated with both the difficulty and joy of the experience. By keeping to this rule, you help preserve the tails for long-term sustainable use and help in protecting the trails integrity for all to enjoy.

When staging, do not block the trail or the access point to the trail:

Pull off to the side of the road near the trailhead to unload and prepare your vehicle for the ride ahead. Avoid driving over parking lot barriers including rocks and other objects and be mindful of your trailers and ramps.

Encountering obstacles on the trails:

Avoid going around obstacles on the trails. Doing so will inadvertently widen the trail, cause erosion issues, and negatively impact vegetation. Stay on the trail and challenge yourself to maneuver over all obstacles while being respectful to others on the trail.

In an effort to help protect the environment, these measures should be taken when encountering similar obstacles on the trail.

1. Mud Puddles:

While maintaining a steady speed, go straight through the mud puddle while being careful to not get stuck.

2. Rocks and Scree Fields:

Go over rocks and scree fields. These are natural elements on a trail and part of the challenge.

3. Downed Trees:

If the tree is too big to climb over, go back and contact the land manager or United States Forest Service.

4. Whoopdies:

Whoops are bumps on the trails that are created from continual trail use. You should proceed to go over the whoops.

5. Switchbacks:

Do not cut the switchbacks. They help with the stability of the trail.

6. Ride Single File:

On tight trails, riding single file will help to avoid braiding and help protect against the widening of the trail.

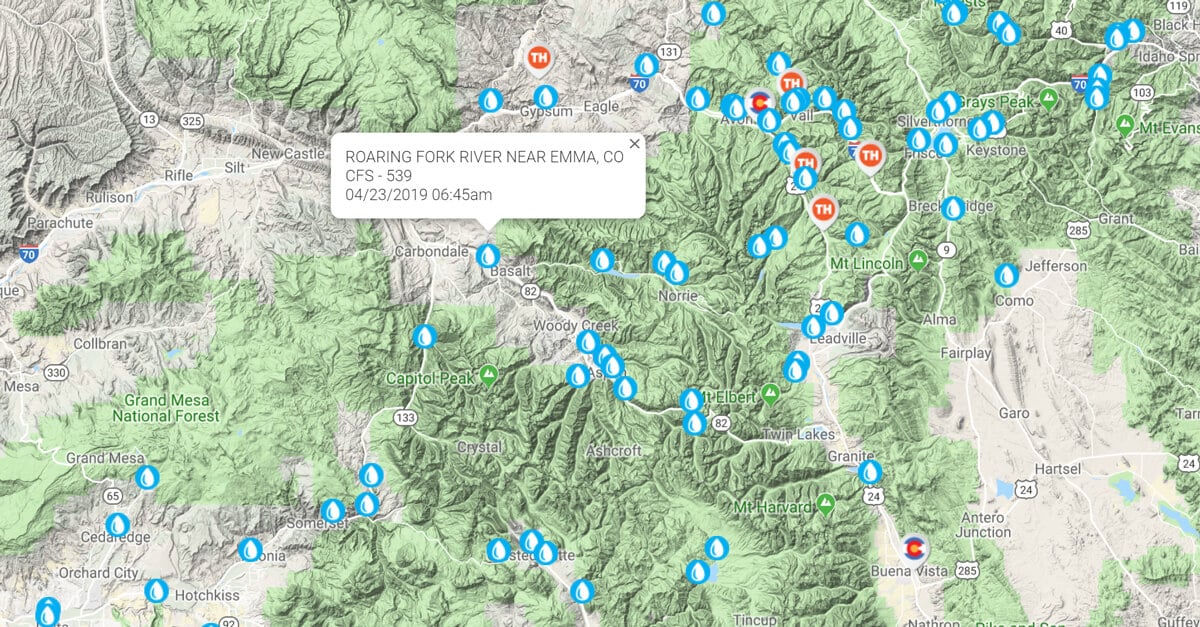
7. Crossing Streams:

If you encounter a stream that must be crossed, do so by crossing at a 90 degree angle while staying on the trail.

8. Avoid Wetlands:

Wetlands are sensitive areas of land that have been designated as protected areas and have important significance to both wildlife and humans. Avoid wetlands and other protected areas at all cost.

Slow down and let others pass:

Slower vehicles should yield to faster moving vehicles. If you are approached on the trail by a faster moving vehicle, you should pull over and allow the faster vehicle to pass. When pulling over, choose a location that is void of sensitive vegetation and be careful to not widen the trail – find a location with added width. When a vehicle approaches, signal your intent to slow down to allow the approaching vehicle to pass.

Use caution on the descent:

Unless unique circumstances exist due to location or obstacles, the descending vehicle should always yield to the ascending (climbing) vehicles.

Passing another vehicle:

When passing another vehicle (from behind), you should always pass on the left side while keeping a safe distance and speed. Signal to the vehicle you are passing and inform their party of how many vehicles remain in your group left to pass. Two fingers indicates that you have two riders behind you and one finger means that there is only one more behind you. If you are the last rider in your group left to pass, a closed fist indicates that there are no more vehicles behind you.

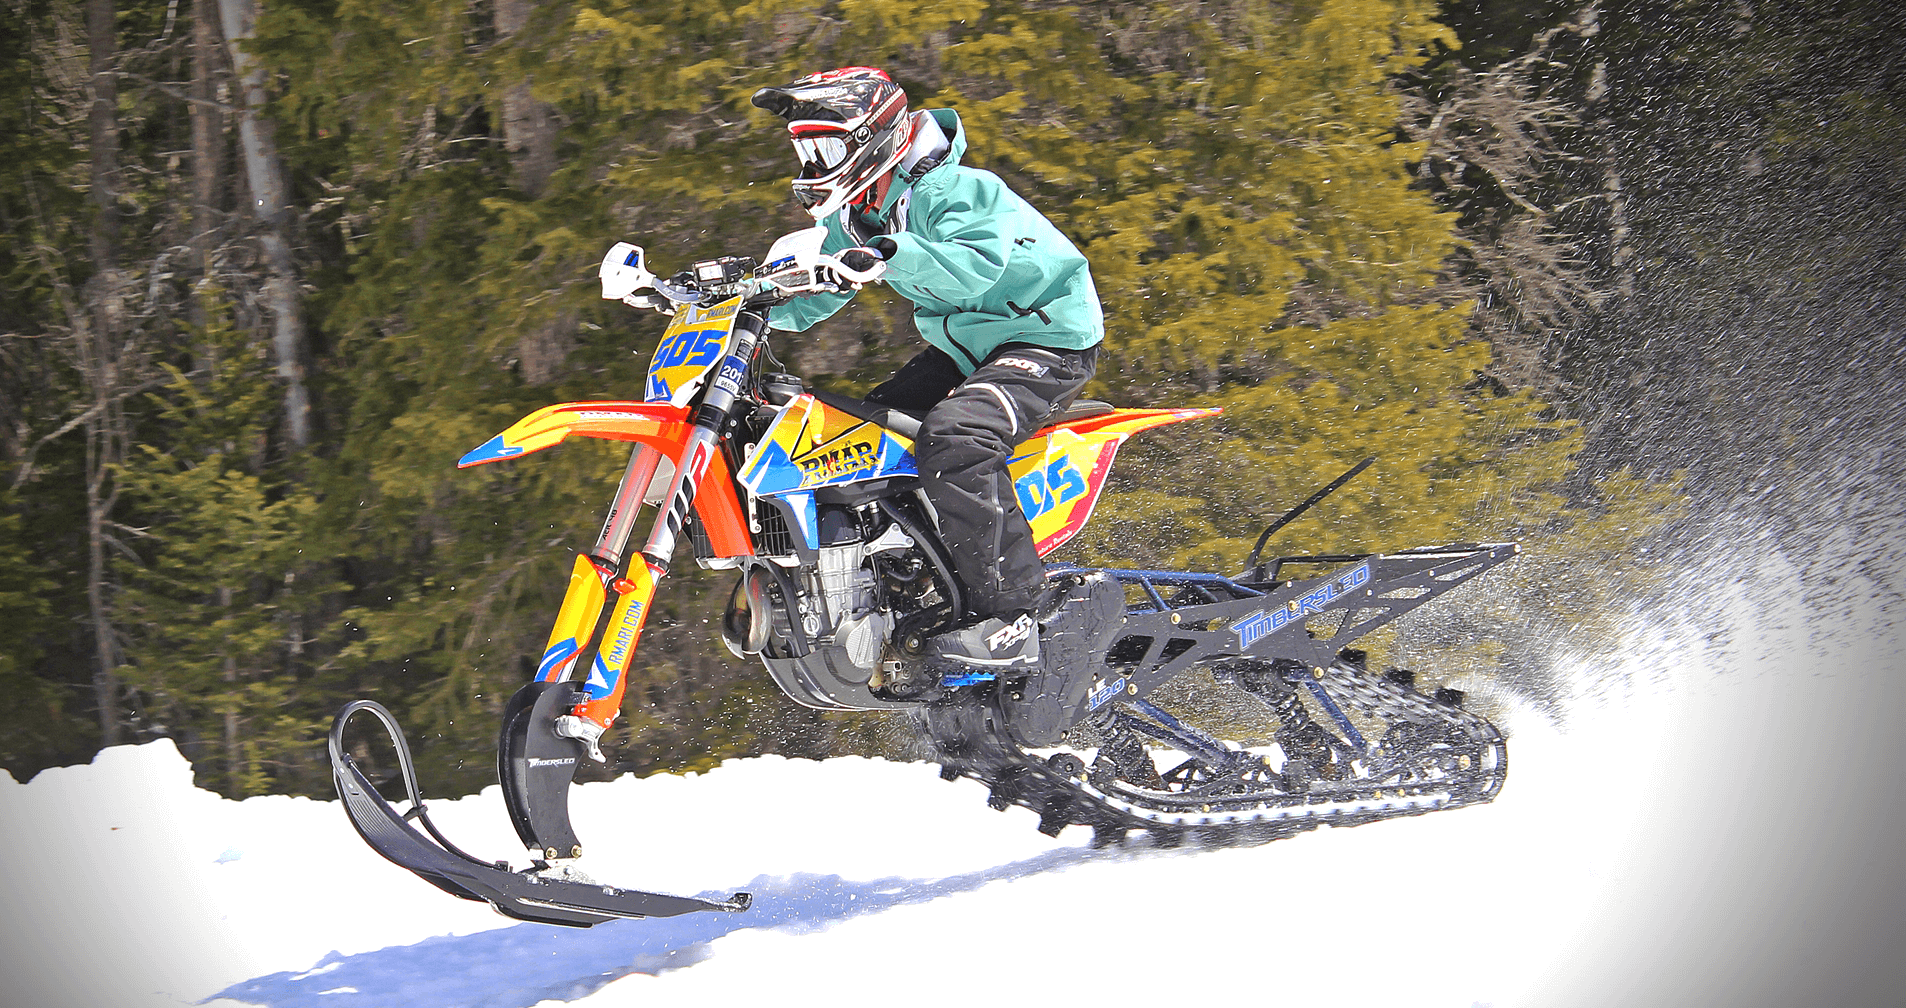
Different vehicles, different approach:

Know your vehicles. Not all vehicles can maneuver the same. Dirt Bikes have minimum speed requirements while it can take some time when passing full-size jeeps and trucks. Dirt Bike and RZR operators should use caution when passing – do not “roost” while passing. Roosting is the process of gassing too quickly causing stones and debris to kick back on the windshield and face visors of the vehicle and riders being passed.

Yield to non-motorized users

Always yield the trail and be prepared to stop when passing or coming across a non-motorized user. Yield the right of way to mountain bikers, hikers, trail runners, and be especially careful when approaching horses.

Be friendly and respectful:

When encountering non-motorized trail users, be courteous and understand the importance of multi-use trails. These trails help to minimize the overall impact on the environment and help to remind us that we all have the same rights to enjoy the trails.

Be aware and be helpful:

When approaching others on the trail, always slow down and provide a healthy berth to avoid surprises. If you come across others in need, pull to the side to help. As a motorized user, you often times have the ability to call for help or to seek help much faster than others.

Always respect wildlife and livestock:

Don’t chase or harass wildlife. Always leave enough space between you and the animals. If you encounter gates on your trip, be sure to leave them as you found them – if opened, leave the gate opened. If closed, leave the gate closed.

Lastly:

Stay where you belong.

1. Remember the 50″ Rule for Side-by-Sides vs ATV’s.

2. Only drive on designated, pre-existing motorized routes.

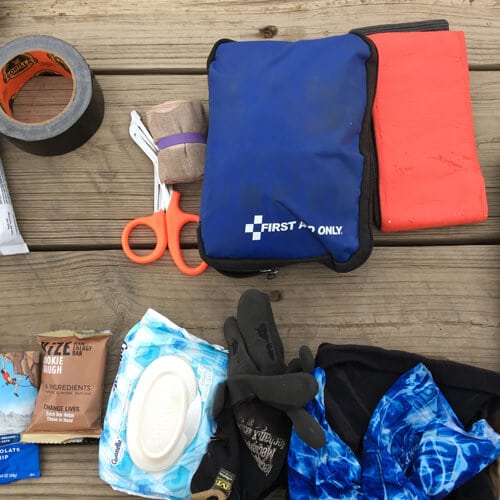
3. Always pack a map and follow the rules of the land set forth by the United States Forest Service (USFS) and the Bureau of Land Management (BLM)

Protect Your Colorado Rivers and Reservoirs

Always Clean, Drain, and Dry your boat, kayak, raft or paddle board (SUP)

Colorado is home to over 30 major rivers, 40 reservoirs, and countless lakes and streams. With the growth of invasive species being introduced throughout our bodies of water, it is important to practice sustainable behaviors when traveling between bodies of water.

Many states including Colorado are passing new laws in an effort to curb the spread of invasive species and it’s up to you to know the requirements of each body of water that you’ll be visiting. This article is intended to cover the basics to help point you in the right direction.

What are invasive species?

Invasive species are microbes, plants, and animals that find their way to areas that are not considered their natural habitat. Once established in a new location, invasive species can threaten the biodiversity of the new location and cause significant ecological and environmental damage.

Steps to Protecting Colorado Water

1. CLEAN:

Always clean your boat/SUP and gear using the water you just floated in. Remove sand, mud, and vegetation.

2. DRAIN:

Remove the standing water that is left in your boat/SUP and gear by draining it out. Use a towel or sponge to remove any water that is left in creases or tight corners.

3. DRY:

Leave your boat/SUP in the sun to let it dry out thoroughly. The chances of spreading invasive species is much lower if all of your gear is dry to the touch.

ALWAYS:

Stop at each inspection station as required by law. The size of your watercraft whether it is a kayak, paddle board, raft, or boat does not matter. The inspection is mandatory. If you have followed the above three steps, the inspection should be quick and painless.

SUP Board Rentals

Paddle Board Rentals

Call: 970-471-8491

Paddle Board Rentals from Rocky Mountain Adventure Rentals. Pick up from our Eagle-Vail location. Many sizes to choose from.

Colorado River Flows

Visit our Colorado River Map to check in on up-to-the-minute river flows. All data is collected from the United States Forest Service and is updated every 15 minutes. 

Buena Vista Tours and Rentals

Come join us in beautiful Buena Vista, Colorado

To reserve machines, give us a call at: 719-966-5233

We are pleased to announce our expansion and new location in Buena Vista, Colorado where we have 3 locations within the San Isabel National Forest to launch our new fleet of Polaris 2 and 4 seat RZR ATVs for guided and unguided tours. We have also paired up with River Runners and Mt. Princeton Hot Springs to offer Adventure Getaway Packages.

Our new location in the South Main area of Buena Vista shares the Adventure Hub location with River Runners and will have other equipment offerings such as Polaris Slingshots, OneWheels and motorcycles for rent.

The RZR rentals will include guided and unguided, full and half day options with a choice of launch location. Location 1 (Trout Creek/Fourmile) and Location 2 (Brown’s Canyon/Bald Mountain) offer terrain best suited for beginner and intermediate riders and Location 3 (St Elmo/Mt. Antero) offers intermediate to advanced terrain including high alpine scree fields and technical rock sections. Half day tours and rentals start at 9am or 1pm and full day rentals at 9am. All rentals include helmets, a full tank of gas, and guide (if choosing guided tour). We will also be offering packages that can include: Hot Springs and/or Hotel packages, Rafting Trips with River Runners, and more.

We are excited to become a part of the Buena Vista community and look forward to a great season. We are equally excited to announce our upcoming winter projects which will include Snowmobile and Timbersled Snow Bike guided and unguided tours and some package offerings as well.

Timbersled Snow Bikes

The history behind the Timbersled Snow Bike

The idea of the Timbersled started back in 2001. The original concepts were using a tire on front with the track system mounted in the back. There were numerous modifications through the years and for the most part, the original Timbersled was difficult to ride and just didn’t offer the float that one looks for when riding through snow. The real breakthroughs came in 2010 and by 2013 the Timbersled Snow Bike was using a super light weight ski up front and a modified rear suspension that offered the necessary float. Now entering 2016, the Timbersled has quickly become the preferred choice for backcountry travel.

In 2013, Rocky Mountain Adventure Rentals became the first company in Colorado to offer the Timbersled Snow Bike as a rental machine. Since then, we have continued to push the boundaries of the sport and introduce Timbersledding to new riders across the country and world. In 2017, Rocky Mountain Adventure Rentals won the first ever Timbersled Enduro Race and is also credited with having the first women’s Timbersled racing team. Through the years, we have perfected the install kits to work efficiently and effectively on KTM Dirt bikes to handle the most extreme conditions.


While the sport of Timbersledding is still in its infancy, we here at Rocky Mountain Adventure Rentals are excited for what the future holds and hope that you will come join us soon.